 how-to
How to Sew a Zipper Into a Skirt for Beginners
Table of Contents
- What You'll Need to Sew a Zipper Into a Skirt
- How to Sew a Zipper Into a Skirt: Step-by-Step
- Best Zipper Foot for Beginners and Zipper Foot Compatibility
- Frequently Asked Questions
Last Updated: September 24, 2026
What You'll Need to Sew a Zipper Into a Skirt
Gather the right tools before starting to prevent frustration mid-project.
Here's what to grab before you start:
- Your skirt fabric pieces (cut and ready to sew)
- A zipper in the length and color you want
- Thread that matches your fabric
- Pins or tailor's chalk for marking
- A seam ripper (for fixing mistakes)
- Scissors for trimming thread
- An iron and press cloth for pressing seams
- A zipper foot for your sewing machine
- Interfacing (optional, but helpful for stability)
The zipper foot is essential, it lets you stitch close to the zipper teeth without hitting them, which a regular presser foot cannot do.
Press your seam allowance flat before starting; use a press cloth to protect delicate fabrics.
How to Sew a Zipper Into a Skirt: Step-by-Step
Follow these manageable steps to sew a zipper into a skirt for beginners with confidence.
Step 1: Prepare Your Seam
Mark your seam allowance with tailor's chalk on the wrong side of both fabric pieces. Pin the two skirt pieces together with right sides facing, backstitch at the start and end, and sew the entire seam closed before opening it back up for the zipper.
Step 2: Apply Interfacing and Pin the Zipper
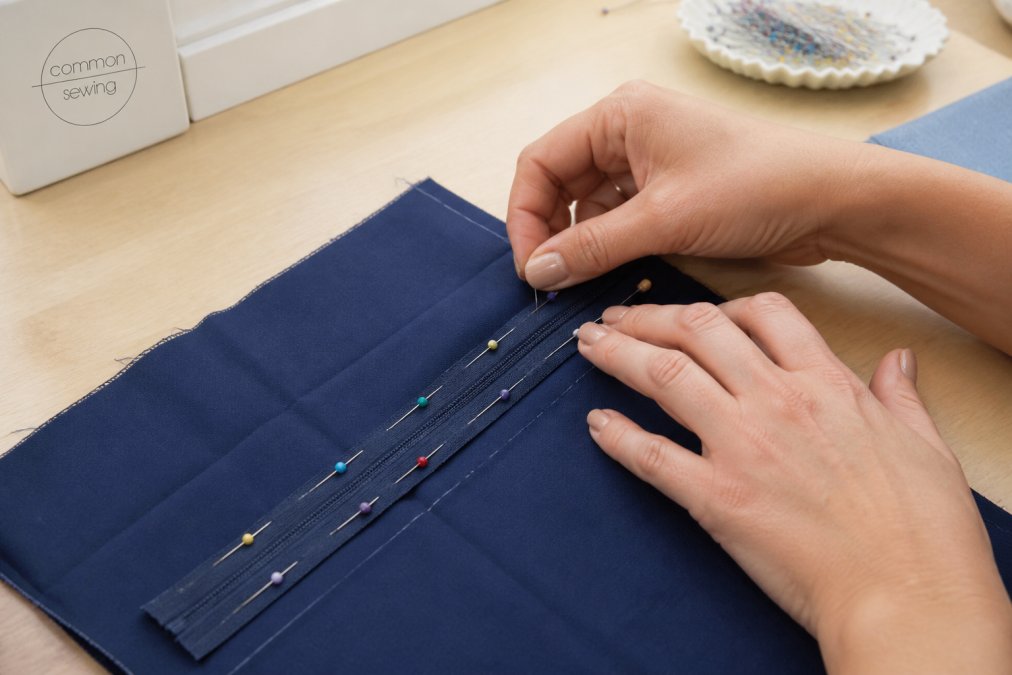
Fuse interfacing to the wrong side of your seam allowance to stabilize the fabric. Open your seam with an iron, position the zipper face-down on the opened seam centered and aligned, and pin it in place.
Step 3: Attach the Zipper Tape
Switch to your zipper foot and set stitch length to medium (around 2.5). Sew down one side of the zipper tape, staying close to the teeth without hitting them, backstitch at the start, then flip and sew the other side the same way.
Step 4: Topstitch for a Professional Finish
Topstitch about one-quarter inch from the seam on both sides of the zipper using a regular presser foot, keeping lines straight and tension consistent for a polished, handmade look.
Best Zipper Foot for Beginners and Zipper Foot Compatibility
The right zipper foot simplifies the process, but compatibility matters since not all zipper feet work the same way.
Most modern sewing machines come with a basic zipper foot; check your manual for compatibility with your machine's snap-on or screw-on presser foot system.
An adjustable zipper foot lets you move the needle position left or right for different zipper widths; invisible zippers require a special invisible zipper foot.
Test your zipper foot on scrap fabric first to catch any tension or alignment issues before sewing your actual skirt.
Frequently Asked Questions
Do I need a special sewing machine foot to sew a zipper?
Yes, a zipper foot is essential for sewing a zipper into a skirt. Unlike a standard presser foot, the zipper foot is narrower and allows you to stitch close to the zipper teeth without hitting them. Most machines accept universal zipper feet, but check your machine's manual to confirm compatibility. This single tool makes the difference between puckering and a professional finish.
What is the difference between a centered zipper and an invisible zipper in a skirt?
A centered zipper runs down the middle of the seam with stitching visible on both sides of the zipper tape. An invisible zipper is installed so the teeth hide behind the fabric, making the seam look seamless from the outside. Invisible zippers require a special invisible zipper foot and more precision, but they create a polished look. Centered zippers are simpler for beginners and work well for casual skirts.
How do you finish the top of a zipper in a skirt?
After stitching the zipper tape, attach the waistband to the top of your skirt. The waistband covers the raw edges of the zipper tape and the top of the seam allowance. Fold the waistband in half lengthwise, pin it to the skirt opening, stitch it in place, then fold it to the inside and topstitch for a finished look. This step stabilizes the zipper and prevents fraying.
Sewing your first zipper feels like a big step. It's not. With the right tools and clear instructions, you'll finish a skirt you actually want to wear. Common Sewing's step-by-step method removes the guesswork so you can focus on building real sewing skills. Start with a simple skirt zipper, master the technique, and you'll be ready for more complex projects.