 ultimate-guide
How to Tailor Clothes at Home: A Step-by-Step Guide
Table of Contents
- Beginner Sewing Tools for Tailoring at Home
- How to Take Body Measurements for Sewing
- How to Tailor Clothes at Home: Pinning and Marking for Fit
- Simple Clothing Alterations for Beginners
- Tailoring for Specific Body Types
- How to Tailor Clothes at Home Without Ruining the Garment
- Sustainable Tailoring: Giving Old Clothes a Second Life
- Conclusion
Last Updated: August 20, 2026
Beginner Sewing Tools for Tailoring at Home
Learning to alter clothes at home begins with your essential tools. Most beginners overbuy expensive equipment or are intimidated by the variety of supplies available. A solid beginner toolkit requires just the essential items that I outline in The Basic Skills Beginners Learn to Sew Series.
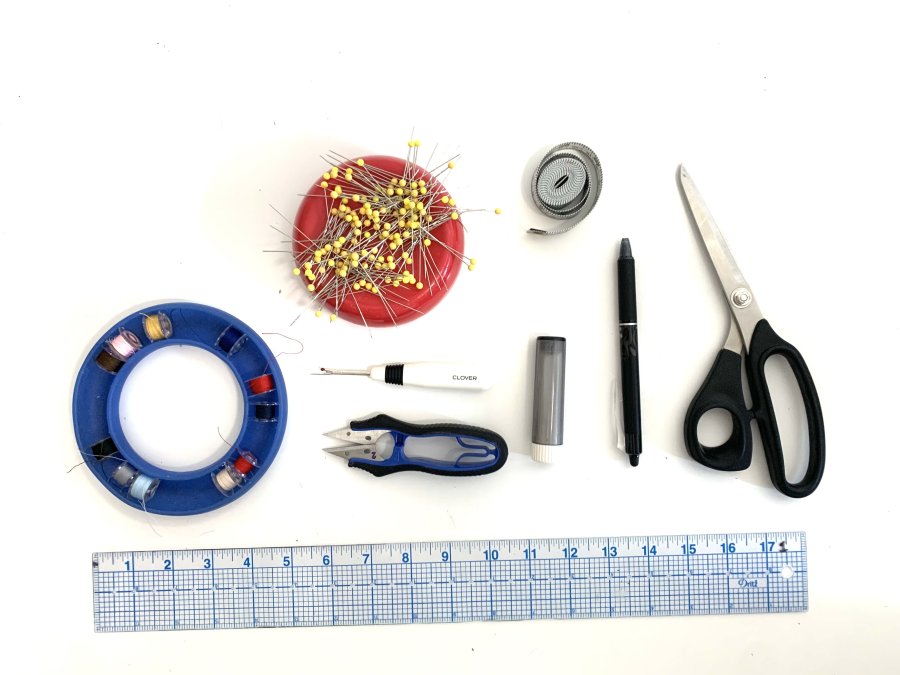
Beginner sewing tools: 8” dressmaker scissors, thread snips, seam ripper, chalk wheel, fabric marking pen, yellow head pins, pin magnet, bobbins, bobbin case, measuring tape, see through grid ruler.
Hand Sewing Essentials: Needles and Thread
You will stitch by hand when you alter your clothes. Start with a mixed pack of sharps (sizes 7-9) for most fabric weights and thread. I use all-purpose polyester thread generally. My favorite brand is Guterman. Tailor's chalk or marking pen transfer fit adjustments onto fabric and brush or iron away. A seam ripper removes stitches without damaging your fabric. You will remove a lot of stitches. You need a 60” measuring tape to take your measurements. I love a magnetic pin fusion and prefer yellow head pins.
Sewing Machine Basics: Straight Stitch and Zigzag Settings
A sewing machine is the workhorse of home tailoring. You don't need a high-end model, and to begin you only need to understand two stitch settings.
The straight stitch is used to build everything - for our purposes her for taking in side seams and hemming. Set your stitch length at setting 3 for most alterations.
The zigzag stitch finishes raw edges to prevent fraying and provides stretch on knit fabrics. Set the width to the medium setting and test it on your fabric.
Thread tension is critical. Correct tension produces stitches that sit evenly between fabric layers. If loops appear on the top surface, the bobbin tension is too loose; if loops appear on the underside, the upper thread tension needs adjusting. Most machines have a dial numbered 1-9 (1 is tighter and 9 is looser); start at 4 and test on a scrap of fabric before sewing your garment.
How to Take Body Measurements for Sewing
Accurate body measurements are the important for tailoring. The American Sewing Guild's measurement guidelines recommend taking measurements over well-fitting undergarments. I generally suggest a tank top and bike shorts.
Building Your Fit Profile: Chest, Waist, Hips, and Inseam
A basic fit profile covers seven measurements that determine how clothing sits on your body.
Measurement | How to Take It | Common Mistake |
|---|---|---|
Chest / Bust | Fullest part of the chest, tape parallel to floor | Holding breath in or slumping |
Waist | Natural waist, 1 inch above navel | Measuring at the hip instead |
Hips | Fullest part of the bootie, 7-9 inches below waist | Tape too high or angled |
Inseam | Crotch to floor along inner leg | Wearing shoes with different heel heights |
Record these measurements. They are good to know, but honestly in our program you will rely more on pinning your clothes to your body to get the fit you want.
How to Tailor Clothes at Home: Pinning and Marking for Fit
Pinning and marking separate a garment that fits from one that almost fits. Put the garment on and pin it to the shape that flatters your body most. I suggest a fit buddy when possible. You change the shape when you twist and turn.
The pinching method: Pinch the excess fabric at the point where the garment is too loose and put a pin in it.
Use tailor's chalk or a fabric marking pen to trace along the pinned line from the inside before you remove your pins. Basting before sewing saves time by temporarily holding the new seam in place so you can try the garment on and check the fit before committing to a permanent stitch. (a basting stitch is either a machine stitch set to the largest width or a hand stitch to create your line).
Simple Clothing Alterations for Beginners
The most useful alterations for beginners focus on fit adjustments that don't require pattern drafting or complex garment construction.
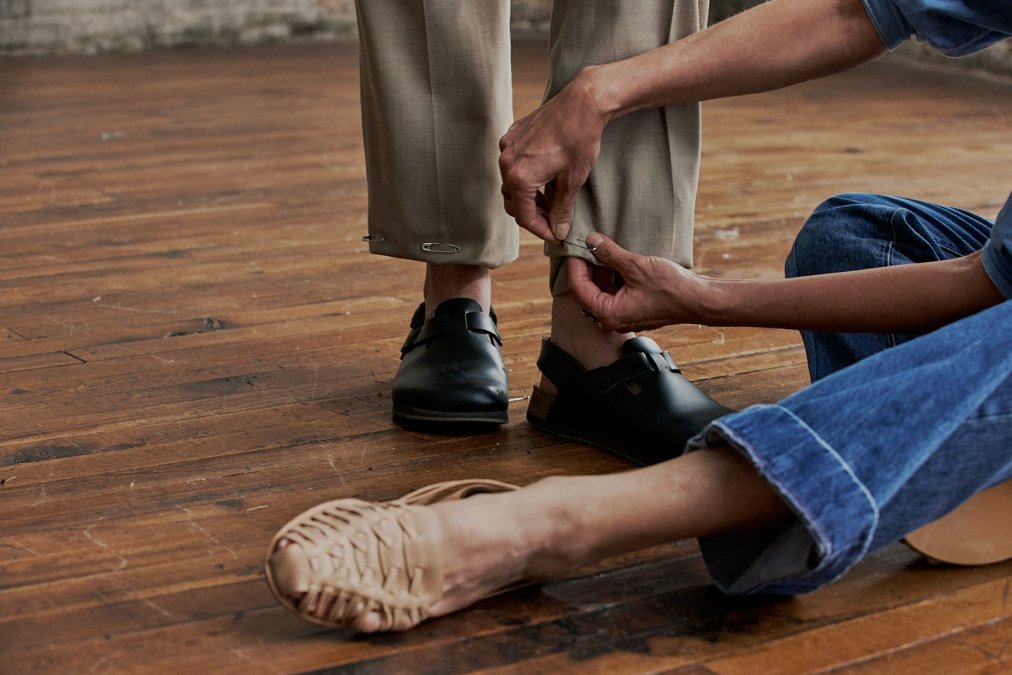
I suggest always using a fit buddy to hem pants.
Taking In Side Seams to Slim a Garment
Taking in side seams is the most fundamental alteration to get the shape that is right for your body. Put your garment on. Pinch the excess fabric evenly on both side seams, the adjustment must be split equally between both seams to keep the garment centered. Pin along the new seam line, tapering smoothly into the existing seam line. Mark with tailor's chalk and baste. Try on, check fit, then sew with a straight stitch at stitch length 3. Finish raw edges with a zigzag stitch or serger, and press the seam allowance open with an iron for a flat, professional result.
Shortening and Hemming Pants
Try the pants on with the shoes you'll wear most often with them. Fold the hem up (or get your buddy to fold the hem up) to the desired length and pin in place where it looks right to you. Good to stand in front of a mirror for this. Mark the fold line with chalk, then add your seam allowance (typically 1.5 inches for a standard hem). Remove the pants, cut along the seam allowance line, and finish the raw edge by folding it and pressing it 1/2” or with a zigzag stitch. Fold the hem up, press with an iron, and pin. Sew the hem with a straight stitch close to the folded/finished edge, or use a blind hem stitch for an invisible finish on dress trousers. Pressing is non-negotiable at every stage, as heat and steam set fabric grain and seam shape in ways that stitching alone cannot achieve.
Tapering Pant Legs for a Modern Fit
Tapering pant legs transforms boxy trousers into a modern silhouette by reducing the leg width from the knee down. Put your pants on and pin them from the knee to the ankle to the taper you like. Turn the pants inside out and mark your pins on your fabric then remove the pins. Baste the new line and try on before sewing permanently. Sew the new seam with a straight stitch, trim the excess seam allowance to 1/2 inch, finish raw edges, and press. Always begin the taper at or below the knee to avoid creating pulling across the knee when walking.
Adjusting Darts for a Better Fit Through the Bust or Back
Darts create three-dimensional shape in flat fabric. A dart that's too long creates a point that pokes outward past the fullest part of the bust; a dart that's too short leaves fabric pulling and gaping. Try your garment on and decide where your body wants your darts to start and stop. Mark you pins from the inside to transfer your body shape to your garment. Don’t be afraid to remove the existing dart and re-draw the line to meet your pins. Just baste it first and try it to make sure your shape is correct. Press your darts toward the center of your garment.
Tailoring for Specific Body Types
Alterations should be the norm in a loved wardrobe, because clothing is not made for individuals but for factory specs. Take it from a photo shoot tailor. Nothing looks good on anyone - even models - until I have gotten my hands on it.
Broad shoulders, narrow waist: Side seam alterations alone won't solve this. Darts at the back help define shape without restricting shoulder movement and creating side seam gathers and puckers.
Full bust, narrow back: Standard bust darts often sit too low or point in the wrong direction. A bust dart adjustment can add width across the bust while keeping the shoulder and side seams intact.
Short torso: Waistbands and empire seams often sit too low. Shortening the bodice above the waist seam corrects this, usually by 1/2 to 1 inch, requiring re-sewing the waist seam at a higher point. I would consider this an intermediate/advanced alteration.
Long legs, short rise: Hemming alone doesn't fix the proportion issue. Inseam length and rise length are separate measurements. A garment with the correct inseam but a low rise will still feel and look wrong.
The principle across all body types is the same: identify the specific measurement that's off, isolate the seam that controls that measurement, and adjust only that seam.
How to Tailor Clothes at Home Without Ruining the Garment
Yes, you can tailor clothes at home without ruining anything if you pin carefully, baste first, sew and only cut when you are happy with your shape. Take your time. You will love this garment if you do for years to come.
Common Mistakes to Avoid
Cutting before fitting: Cutting away excess fabric is permanent. Always baste, try on, and confirm the fit before cutting anything.
Ignoring fabric grain: Seams cut or sewn off-grain produce garments that twist, pull, and hang incorrectly. Always align seam lines parallel or perpendicular to the grain unless the pattern specifically calls for a bias cut.
Skipping the press: An iron is as important as a sewing machine in tailoring. Press every seam open or to one side as you sew it.
Using the wrong needle for the fabric: A ballpoint needle is required for knit fabrics; a sharp or microtex needle suits woven fabrics. Using the wrong needle causes skipped stitches, fabric damage, and thread breakage.
Altering too aggressively: Make adjustments in increments. Taking in 3 inches in a single pass distorts the garment structure. Two passes of 1.5 inches each produce a cleaner result.
The Craft Industry Alliance's resources on textile handling offer additional guidance on working with different fabric types.
Sustainable Tailoring: Giving Old Clothes a Second Life
Tailoring clothes at home is one of the most direct ways to reduce textile waste. The EPA's overview of textile waste and sustainable consumption identifies clothing repair and reuse as among the highest-impact individual actions for reducing the environmental footprint of personal wardrobes.
Practical approaches to sustainable tailoring include resizing to fit so garments get worn regularly, updating silhouettes by tapering wide-leg trousers or shortening oversized blazers, repairing before replacing by fixing broken zippers or reinforcing worn seams, and upcycling by converting dresses into skirts or using fabric from worn-out garments to patch others. The skill set for sustainable tailoring overlaps almost entirely with basic alterations. If you can hem a pair of pants and take in a side seam, you have the core skills needed to repair and update most garments in a wardrobe.
Common Sewing's project-based curriculum is built around exactly this kind of practical application: learning techniques through real garments, not abstract exercises. Instructor Bonnie, with 25 years of experience as a photo shoot tailor, structures each lesson around skills that transfer directly to the clothes already hanging in your closet.
Frequently Asked Questions
How easy is it to tailor your own clothes at home?
Basic tailoring is very manageable for beginners. Simple alterations like hemming pants, taking in side seams, or shortening sleeves require only a few tools and a basic straight stitch. The key is starting with forgiving fabrics like denim or cotton, working slowly, and basting seams before committing to a final stitch. Most beginners complete their first successful alteration within a few hours of practice.
What basic sewing tools do I need to start tailoring clothes at home?
The essentials for home tailoring are a measuring tape, tailor's chalk or fabric marker, a seam ripper, sharp fabric scissors, straight pins, hand-sewing needles, a thimble, and a bobbin of quality thread. A sewing machine with a straight stitch and zigzag stitch setting makes garment modifications faster and more durable, but several simple alterations can be done entirely by hand.
Which clothing items are the easiest to tailor for beginners?
Pants and straight-cut shirts are the most beginner-friendly garments to alter. Hemming the bottom of pants involves a single straight seam, while taking in side seams on a boxy shirt requires only basic straight stitching. Avoid stretchy knit fabrics when starting out — woven fabrics like cotton and linen hold their shape during pinning and pressing, making the alteration process much more predictable.
Can I tailor clothes without a sewing machine?
Yes. Hemming, closing small seams, and hand-basting for fit all work well with just a needle and thread. A slip stitch is ideal for invisible hems on dress pants. That said, a sewing machine with a straight stitch setting produces stronger, more durable seams on structural alterations like side seams and waistband adjustments. For anything load-bearing, machine stitching is the more reliable choice.
This article was written using GrandRanker