 how-to
How to Use a Sewing Machine for Beginners
Table of Contents
- Know Your Machine: Anatomy of a Sewing Machine
- How to Wind a Bobbin the Right Way
- How to Thread a Sewing Machine for Beginners
- Basic Controls, Stitches, and How to Start Sewing
- Sewing Machine Troubleshooting Tips for Beginners
- Beginner Sewing Machine Projects to Build Real Skills
- Conclusion
Last Updated: August 21, 2026
Know Your Machine: Anatomy of a Sewing Machine
Learning how to use a sewing machine for beginners starts with understanding what you're looking at. Once you know what each part does, the whole process clicks into place.
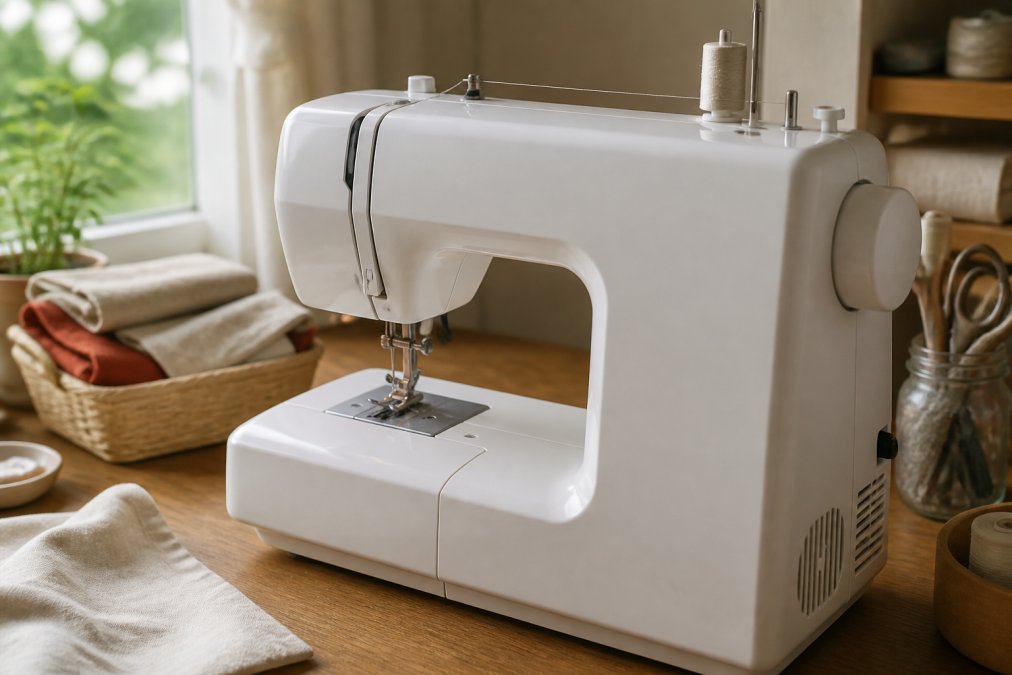
Here are the parts you need to know before you sew a single stitch:
- Thread spool pin, holds your thread spool upright on top of the machine
- Hand wheel, the large wheel on the right side; turning it manually moves the needle up and down
- Presser foot, the metal foot that holds fabric flat against the needle plate while you sew
- Needle plate, the flat metal surface beneath the presser foot, usually marked with seam allowance guides in fractions of an inch
- Feed dogs, the small ridged teeth below the needle plate that grip and advance your fabric automatically
- Thread take-up lever, the hook-shaped arm on the front of the machine that moves up and down with the needle; thread must pass through it during threading
- Tension dial, controls how tightly the upper thread is pulled; getting this right is essential for clean stitches
- Stitch length and stitch width controls, adjust how long each stitch is and, for stitches like the zigzag stitch, how wide they spread
- Reverse button, lets you sew backward to lock your stitches at the start and end of a seam
- Foot pedal, the floor pedal that controls your sewing speed; press gently for slow, press firmly for fast
Digital vs. Mechanical Machines: What Beginners Should Know
A mechanical sewing machine uses physical dials and levers to control stitch length, stitch width, and tension. A digital sewing machine uses an electronic display and buttons, often with built-in stitch memory and automatic tension adjustment.
For true beginners, mechanical machines have a real advantage: you can feel and see every adjustment you make. Digital machines reduce guesswork with automatic tension adjustment, but cost more and are harder to repair.
The honest recommendation: start on a mechanical machine if you want to truly understand what you're doing. Graduate to digital when the manual adjustments feel second nature.
How to Wind a Bobbin the Right Way
The bobbin is a small spool that sits below your needle plate and supplies the lower thread. Without a properly wound bobbin, your stitches will be loose, loopy, or completely absent on the underside of your fabric.
Here's how to wind a bobbin correctly:
- Place your thread spool on the spool pin and make sure it spins freely.
- Pull the thread through the bobbin winding thread guide, usually a small hook or post near the top of the machine.
- Thread the bobbin by pulling thread through the small hole in the top of the empty bobbin, then place the bobbin on the bobbin winder pin.
- Slide the bobbin pin to the right (on most machines) to engage the winding mechanism.
- Hold the thread end and press the foot pedal. After a few rotations, trim the tail of thread sticking out of the hole.
- Wind until the bobbin is full, then stop. A properly wound bobbin should be evenly filled, with thread sitting flat and tight.
- Cut the thread and remove the bobbin.
Once wound, drop the bobbin into the bobbin case according to your machine's manual. Most machines require the thread to unwind in a specific direction (usually counterclockwise). Getting this wrong is one of the most common reasons beginners experience skipped stitches.
How to Thread a Sewing Machine for Beginners
Threading is where most beginners struggle. The path the upper thread takes through the machine is specific and unforgiving, but the sequence is logical once you follow it from top to bottom.
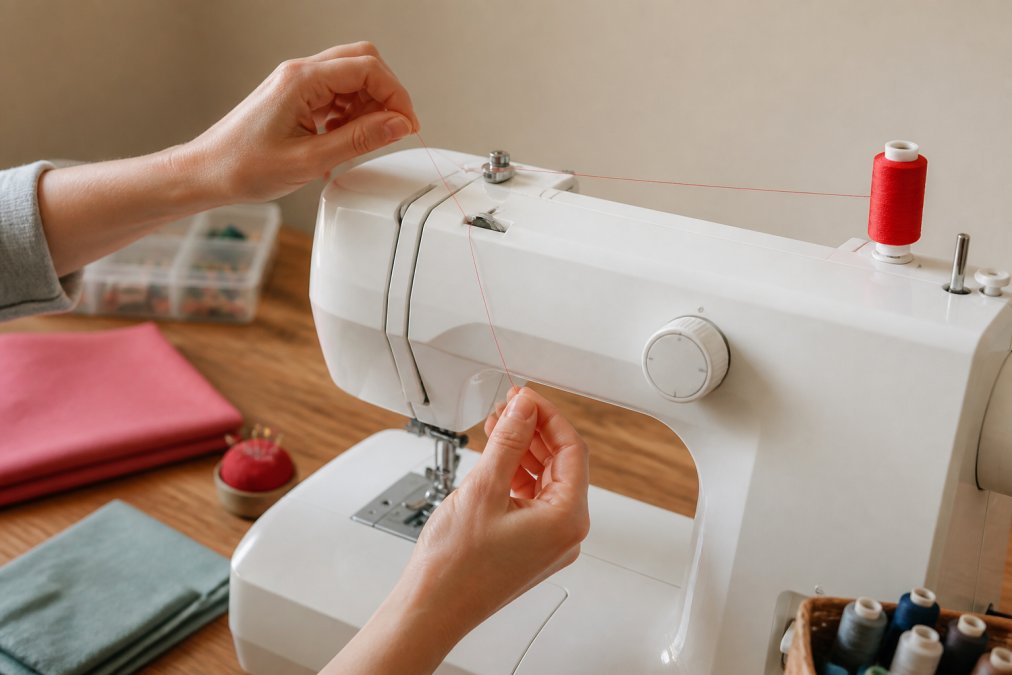
Follow these steps every time you thread your machine:
- Raise the needle to its highest position by turning the hand wheel toward you. Threading with the needle down causes misalignment.
- Raise the presser foot. This releases the tension discs so thread can slide between them properly.
- Place your thread spool on the spool pin and pull the thread toward the first thread guide at the top of the machine.
- Pull the thread down and around the tension dial area. Most machines have a U-shaped channel on the front; the thread travels down one side and up the other.
- Thread the take-up lever. Pull the thread up and through the hook of the thread take-up lever. This step is the one beginners most often miss.
- Continue down through any remaining thread guides toward the needle.
- Thread the needle from front to back (on most machines). Use the built-in needle threader if your machine has one.
According to the Singer sewing machine support resources, following the numbered thread guides printed on the machine in sequence is the most reliable way to avoid threading errors.
Bringing Up the Bobbin Thread
Once the machine is threaded, you need to bring the bobbin thread up through the needle plate before you sew.
Here's how:
- Hold the upper thread loosely in your left hand.
- Turn the hand wheel toward you one full rotation. The needle will descend, catch the bobbin thread loop, and come back up.
- Pull the upper thread gently. A loop of bobbin thread will come up through the needle plate hole.
- Use a seam ripper or your fingertip to pull the bobbin thread loop all the way out.
- Lay both thread tails (upper and bobbin) toward the back of the machine, under the presser foot.
You're now ready to sew.
Basic Controls, Stitches, and How to Start Sewing
A sewing machine for beginners becomes far less intimidating once you understand the three controls you'll use most: the foot pedal, the reverse button, and the stitch selection dial.
The foot pedal controls speed. Press it gently for slow, deliberate stitching, especially important when sewing curves or starting a seam. Most beginners press too hard too fast. Slow down. The machine does the work; your job is to guide the fabric.
The reverse button locks your stitches. At the start of every seam, sew forward three or four stitches, then hold the reverse button and sew backward over those same stitches. Do the same at the end. This is called backstitching, and it prevents your seams from unraveling.
For most beginner projects, you'll use two stitches:
- Straight stitch, the workhorse stitch for seams, hems, and topstitching
- Zigzag stitch, used to finish raw fabric edges and prevent fraying
Set your stitch length to around 2.5mm for most woven fabrics. Longer stitches (3-4mm) work well for basting or heavy fabric. Shorter stitches (1.5-2mm) are better for curves and fine fabric.
Sewing Straight Lines and Curved Lines
Sewing a straight line is about alignment, not speed. Most needle plates have seam allowance markings etched into the metal, lines at 3/8 inch, 1/2 inch, and 5/8 inch from the needle. A standard seam allowance in garment sewing is 5/8 inch. Keep the edge of your fabric aligned with the correct marking and let the feed dogs do the rest.
Curved lines require pivoting. To pivot, stop the machine with the needle in the down position, lift the presser foot, rotate the fabric to follow the curve, lower the presser foot, and continue sewing. For tight curves, pivot every half inch or less. Slow down through any curved section; speed is the enemy of accuracy on curves.
Posture, Ergonomics, and Fabric Compatibility
Sit with your chair at a height where your forearms are roughly parallel to the table surface. Your elbows should be close to your body, not raised or splayed outward. Position the machine close enough that you're not reaching forward.
Using the wrong needle for your fabric is one of the most common causes of skipped stitches, broken thread, and fabric damage. Here's a quick reference:
| Fabric Type | Needle Type | Needle Size |
|---|---|---|
| Lightweight cotton, quilting fabric | Universal | 70/10 or 80/12 |
| Medium-weight woven (denim, canvas) | Denim/Jeans | 90/14 or 100/16 |
| Knit fabric, jersey, stretch | Ballpoint or Stretch | 75/11 or 90/14 |
| Sheer, delicate (chiffon, silk) | Microtex/Sharp | 60/8 or 70/10 |
| Leather, faux leather | Leather | 90/14 or 100/16 |
Change your needle after every 8-10 hours of sewing. A dull needle damages fabric layers and causes skipped stitches.
Sewing Machine Troubleshooting Tips for Beginners
The most common sewing machine problems have simple fixes. As noted in the BERNINA sewing resource library, the majority of beginner machine problems trace back to threading errors or incorrect tension settings.
| Problem | Most Likely Cause | Fix |
|---|---|---|
| Thread bunching under fabric | Bobbin threaded incorrectly or upper thread not through tension discs | Rethread both upper and bobbin thread from scratch |
| Skipped stitches | Wrong needle type, dull needle, or needle installed backward | Replace needle; check flat side faces back |
| Thread breaking | Tension too tight, thread caught on spool, or needle too small for thread | Reduce tension, check spool, upgrade needle size |
| Fabric not moving | Feed dogs lowered or presser foot not engaged | Raise feed dogs; lower presser foot before sewing |
| Needle breaking | Fabric pulled manually while sewing, wrong needle size | Let feed dogs advance fabric; match needle to fabric |
When something goes wrong, rethread the entire machine, upper thread and bobbin, before trying anything else. Threading errors cause roughly three-quarters of the problems beginners encounter, and it takes less than two minutes to rule it out.
Cleaning and Oiling: A Simple Maintenance Schedule
A sewing machine that's never cleaned accumulates lint in every gap around the feed dogs, bobbin case, and needle plate. That lint buildup causes tension problems, skipped stitches, and eventually motor strain.
The guide to sewing machine maintenance from the American Sewing Guild recommends cleaning your machine after every major project, or roughly every 8-10 hours of sewing.
Here's a simple maintenance routine:
- Remove the needle plate (usually held by one or two screws) and use a small brush to sweep out lint from around the feed dogs and bobbin area.
- Remove the bobbin and bobbin case and brush out any accumulated lint from the bobbin housing.
- Wipe down the exterior with a soft, dry cloth.
- Oil the machine if your model requires it. Check your manual; many modern machines are self-lubricating and should not be oiled. For machines that do require oil, apply one small drop to the designated oil points only.
- Replace the needle as part of your maintenance routine.
Make cleaning a habit, not an emergency measure.
Beginner Sewing Machine Projects to Build Real Skills
The fastest way to learn how to use a sewing machine for beginners is to make something real. The right beginner projects build specific skills in a logical order, so each project prepares you for the next.
Start here:
- Straight-line sampler, Sew rows of straight stitches on scrap fabric, practicing consistent seam allowance and backstitching at both ends.
- Fabric coasters, Two squares of fabric sewn together and turned right-side-out. Introduces corners, pivoting, and topstitching.
- Tote bag, Straight seams on heavier fabric, with handles. Builds confidence working with multiple fabric layers.
- Zippered pouch, Introduces zipper insertion, one of the most transferable skills in sewing.
- Simple pillowcase, Combines straight seams, pressing, and finishing techniques in a project with immediate practical value.
- Elastic-waist skirt or pajama pants, First garment project. Introduces cutting from a pattern, seam finishing with zigzag stitch, and casing for elastic.
Each project is a skill checkpoint. The structured, project-based approach used by Common Sewing, developed over 25 years of professional tailoring experience, is built on exactly this principle: every project teaches the techniques you'll use in the next, more complex one.
The biggest mistake beginners make is skipping ahead to ambitious projects before the fundamentals are solid. Sew the coaster before you sew the dress. The skills compound.
For anyone who has a machine sitting unused in a closet, the answer isn't more research, it's threading the machine today and sewing one straight line. Everything else follows from there.
Frequently Asked Questions
Can I teach myself to use a sewing machine?
Yes, most beginners can learn to use a sewing machine on their own. Starting with a structured, step-by-step approach makes a real difference compared to jumping between random tutorials. Focus on the basics first: threading the machine, winding a bobbin, and sewing straight lines. Once those feel comfortable, curved lines and more complex stitches follow naturally. A clear learning path removes the frustration that causes most beginners to quit early.
What is the first thing a beginner should sew?
A simple pillowcase or fabric tote bag is the best first project for most beginners. Both involve only straight lines, minimal cutting, and a forgiving seam allowance, so small errors don't ruin the finished piece. These projects teach you how to start and stop sewing, how to backstitch to fasten off seams, and how to handle fabric layers without stretching them. Completing a usable item quickly also builds the confidence to move on to harder projects.
How do I troubleshoot common sewing machine issues?
Most sewing machine problems come down to three things: incorrect threading, wrong tension settings, or a dull needle. If your thread keeps breaking, re-thread the machine from scratch and check the tension dial. Skipped stitches usually mean the needle is bent or the wrong size for your fabric. Fabric not moving under the presser foot is often a feed dog issue. Always consult your machine's manual for model-specific calibration steps before assuming a mechanical fault.
What are the essential parts of a sewing machine I need to know?
The parts that matter most for beginners are the bobbin and bobbin case, presser foot, needle and needle plate, thread spool pin, thread take-up lever, tension dial, stitch length and stitch width controls, feed dogs, hand wheel, reverse button, and foot pedal. Understanding what each part does before you start sewing saves significant troubleshooting time later. Your machine's manual will show exactly where each component is located on your specific model.
Sewing is a skill that rewards patience and repetition. If you've felt stuck by fragmented tutorials or unsure where to start, Common Sewing's structured program, led by professional tailor Bonnie, gives you a clear, sequenced path from your first stitch to confident garment construction. Sign up with your email address to receive news and updates and take the first step toward sewing with real confidence.
This article was written using GrandRanker